Time to Get Crafty: Making a Rainbow Tassel Garland
Low on cash but want to spice up your room in a fun way? We’ve got the perfect, easy DIY project for you. Read on to learn how to make a rainbow tassel garland to add color and whimsy to any boring walls.
Time: 2 hours
Cost: Under $10

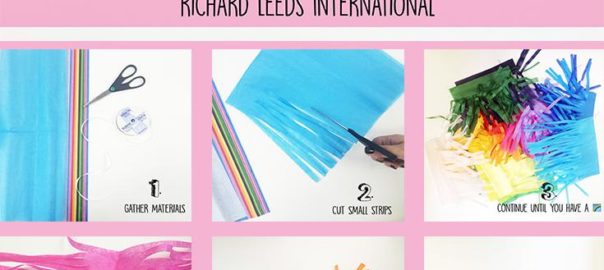
What you’ll need:
-varying colors of tissue paper
-ribbon, string, or cord
-scissors
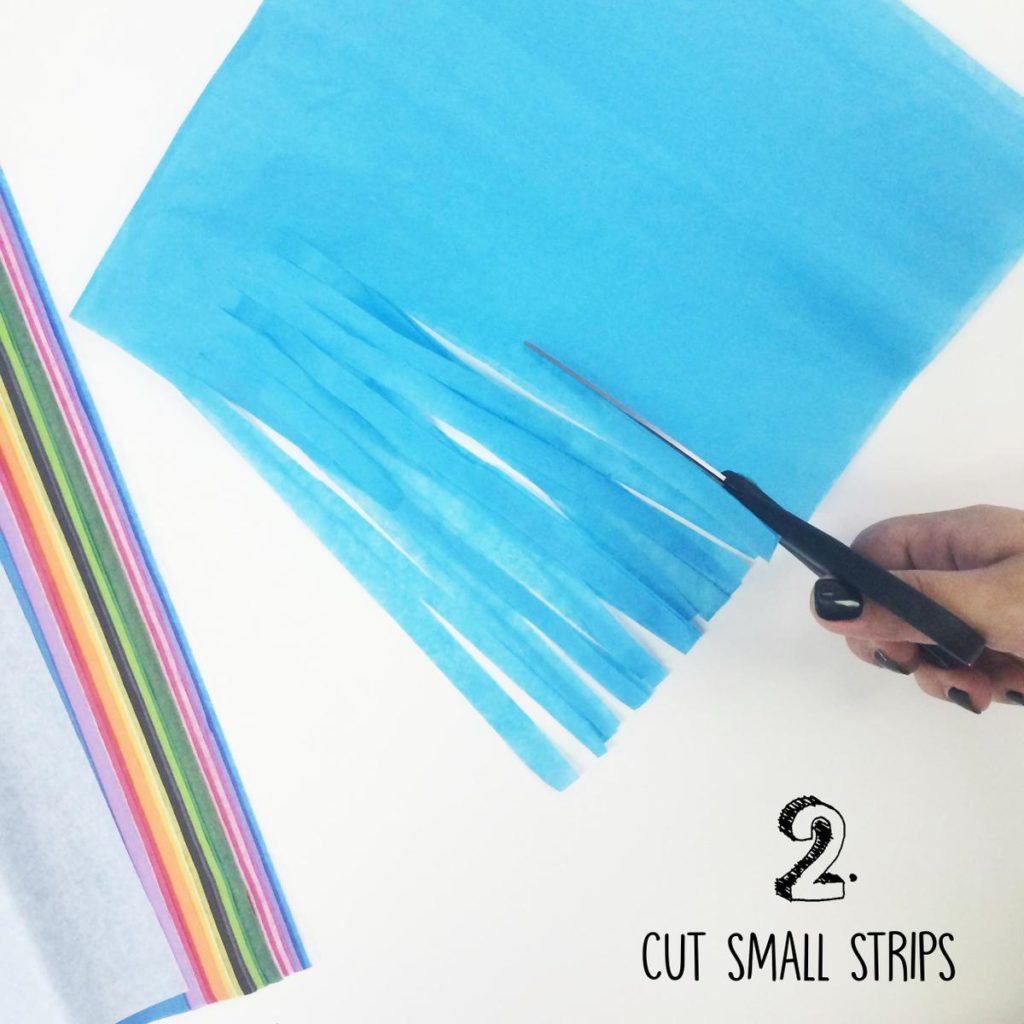
After gathering your materials, start by folding the tissue paper in half width wise. Take scissors and cut small strips up towards the fold at desired width. Stop about an inch to inch and a half below the fold.

Continue cutting the tissue paper until you have all the desired colors you like. This is the most time consuming part of the project– it gets easier from here!
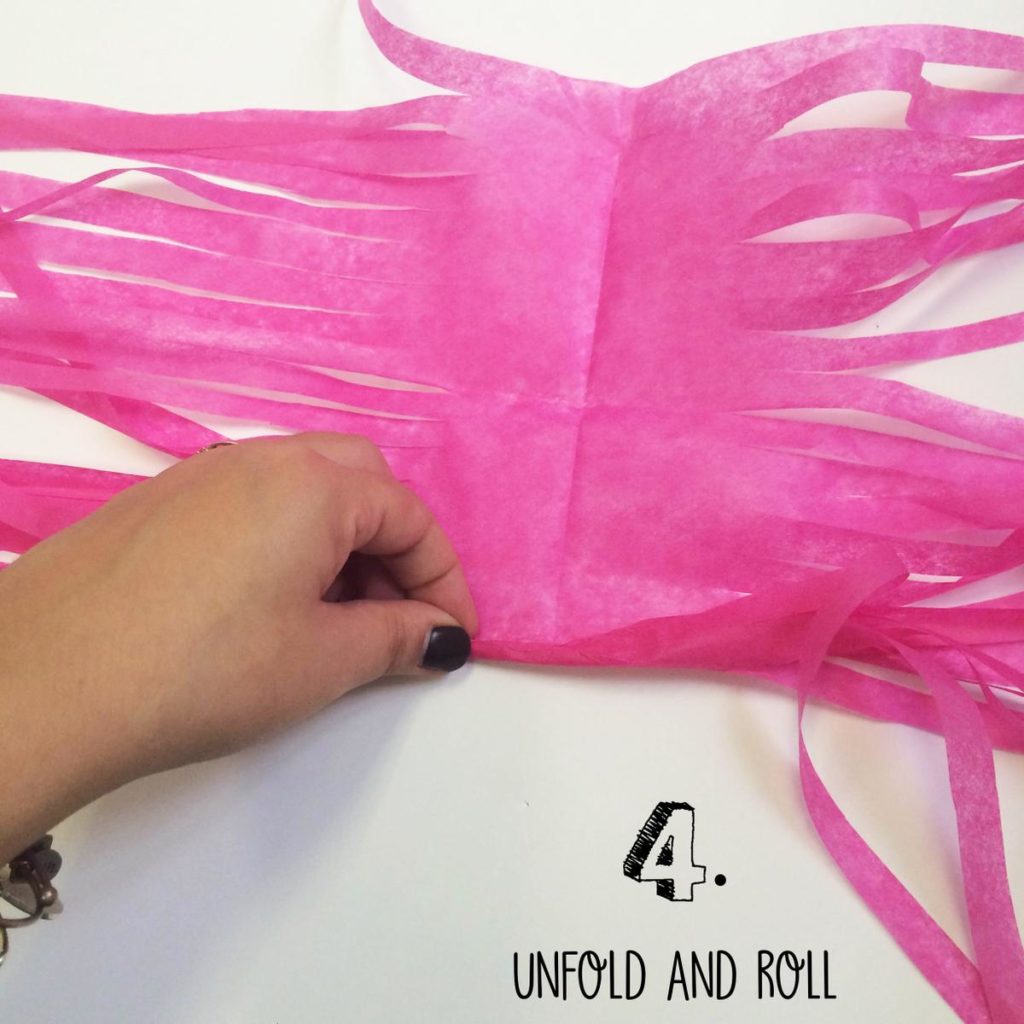
Unfold the sheet so the cuts face outward. Starting at one end, tightly roll the sheet down the middle until reaching the end.

Once the tissue paper is rolled, twist the middle of the uncut section tightly to create two defined ends of the tassel with a narrow middle.
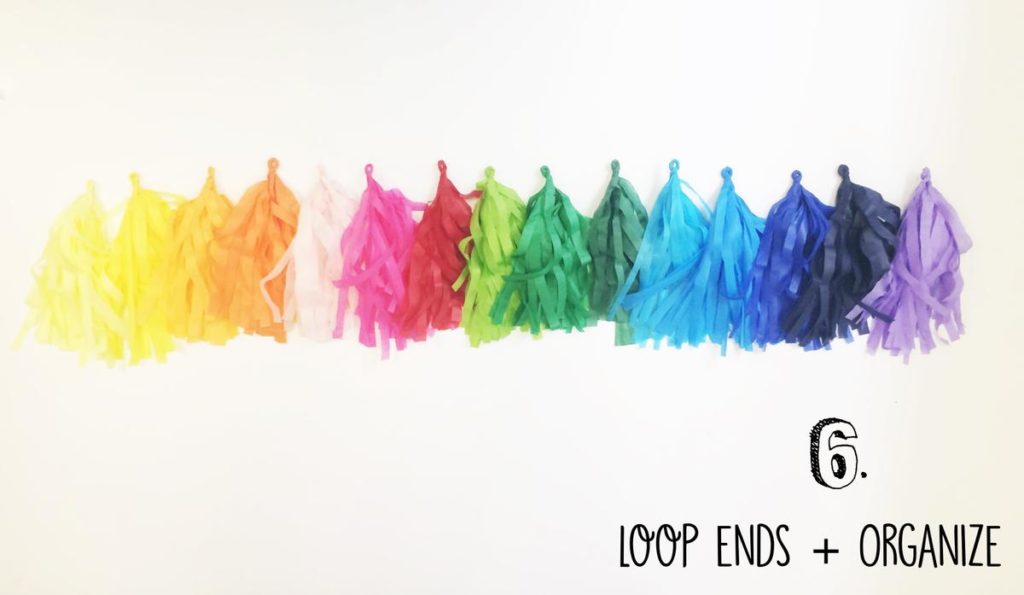
Take the twisted section and form a loop so both sides of the tassel come together. Organize the tassels in the order you’d like them to hang.
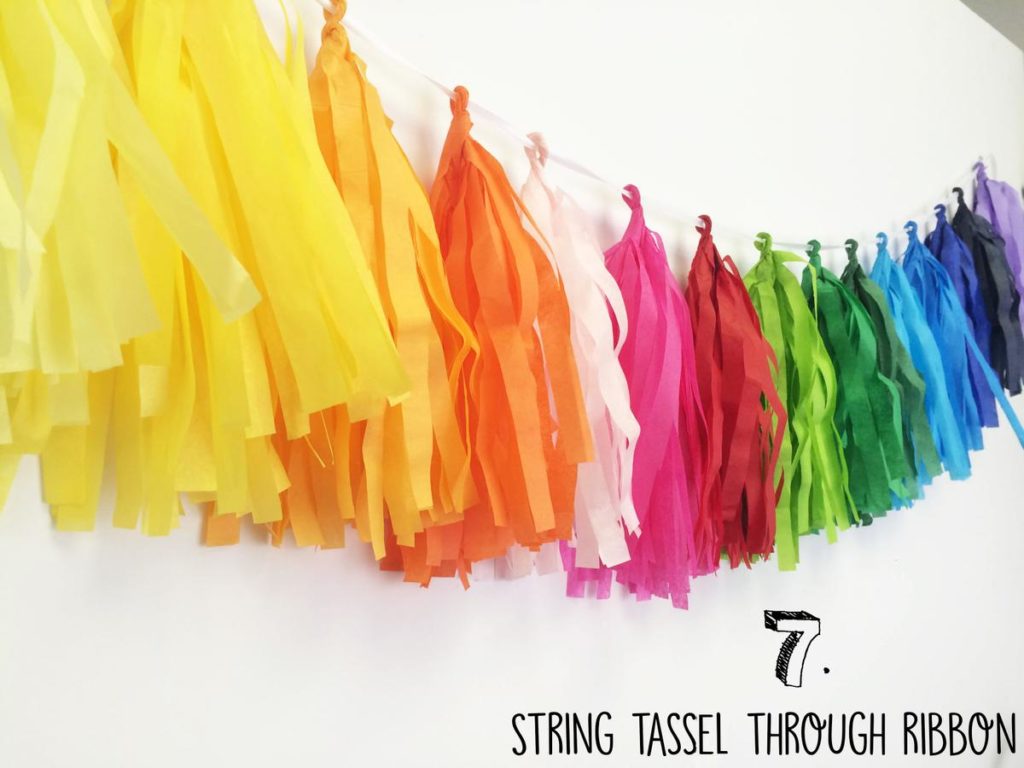
Weave a ribbon or your choice of string through the loops and space the tassels apart evenly.

All finished! Hang the garland over your bed or on a blank wall as a center piece. You can loop the ribbon ends and hang them on nails, or use some decorative washi tape to adhere it to the wall.
Don’t Forget
Send us photos of your DIY rainbow tassel garlands on twitter @richardleedsint and leave ideas down below for the next DIY project you’d like to see! Also, stay tuned for new product launching soon in September at Wal-Mart. Target, and Hot Topic. x